 Skip to content


Our wind chimes are a forever product and the people who own them become very attached to them, and don't want to throw them away and buy a new one.
Sometimes, they just want to repair their wind chime themselves, and we have written the following guide in an effort to help them tackle the job. The most important thing to consider is the type of cord you should use. Please don't use fishing line or string - it won't last. Depending on the size of the wind chime, we use either an 8 ply or 12 ply Australian made polyester cord, the similar to that used for venetian blinds, only UV treated. It is very strong and will last a very long time.
We have jigs which hold all the components in place when we carry out a refurbishment, but we have written this guide on the basis that you do not have these aids. We hope you will find this guide useful if you want to tackle restringing your Windsong wind chime.
There are three sections to stringing a Windsong wind chime. It is important to use a blunt needle to avoid snagging the cord as you string – the best sort of needle for this purpose is a tapestry needle:
- Top stringing
- Pipe stringing
- Centre stringing
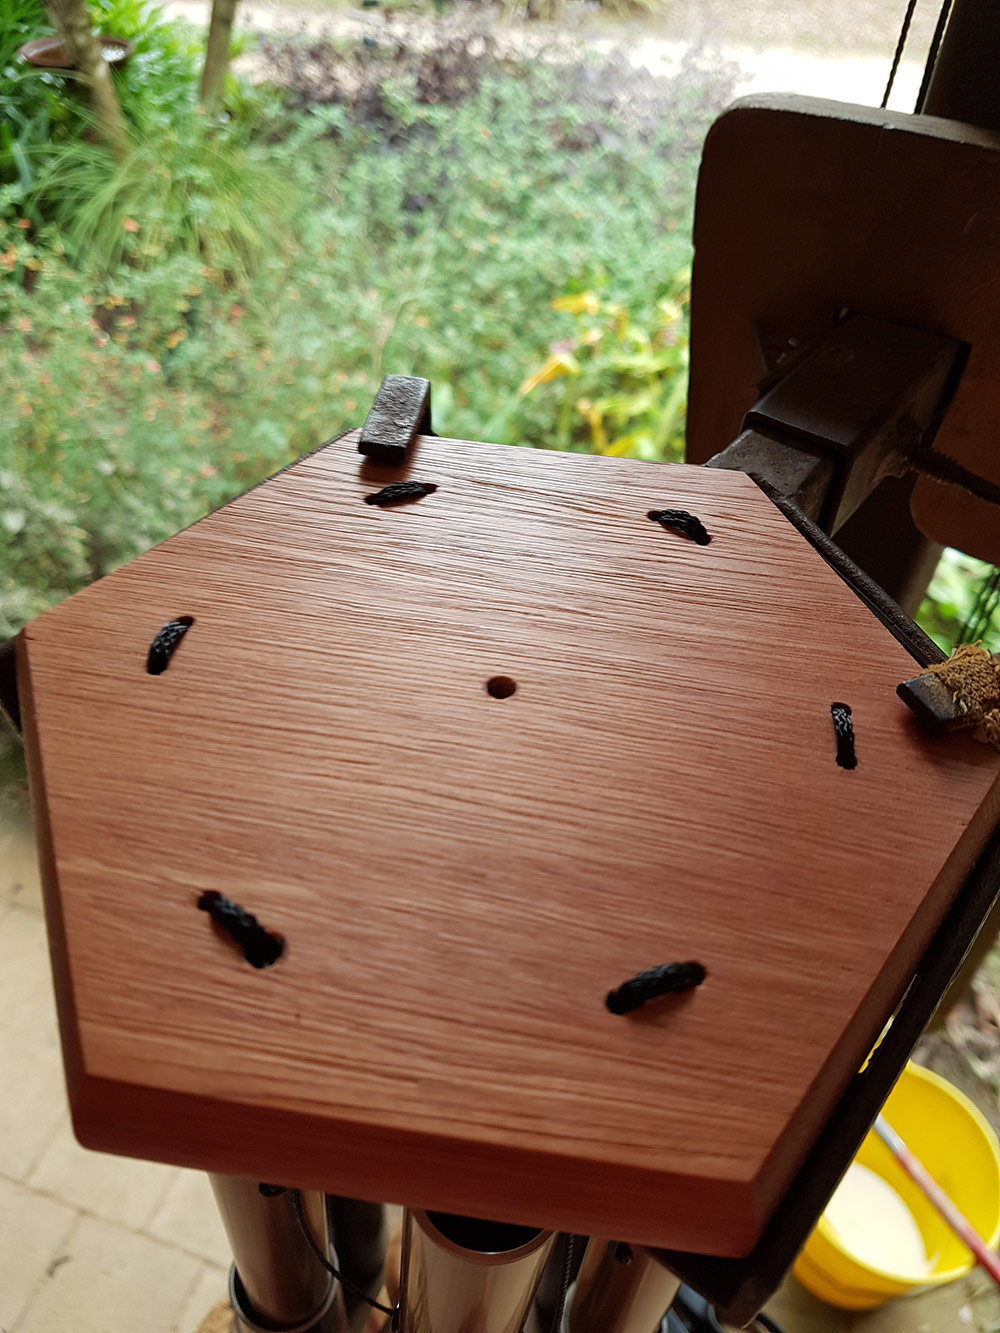
Top stringing
Top stringing should be done first so that you can hang the top from a hook to enable you to do the pipe stringing next.
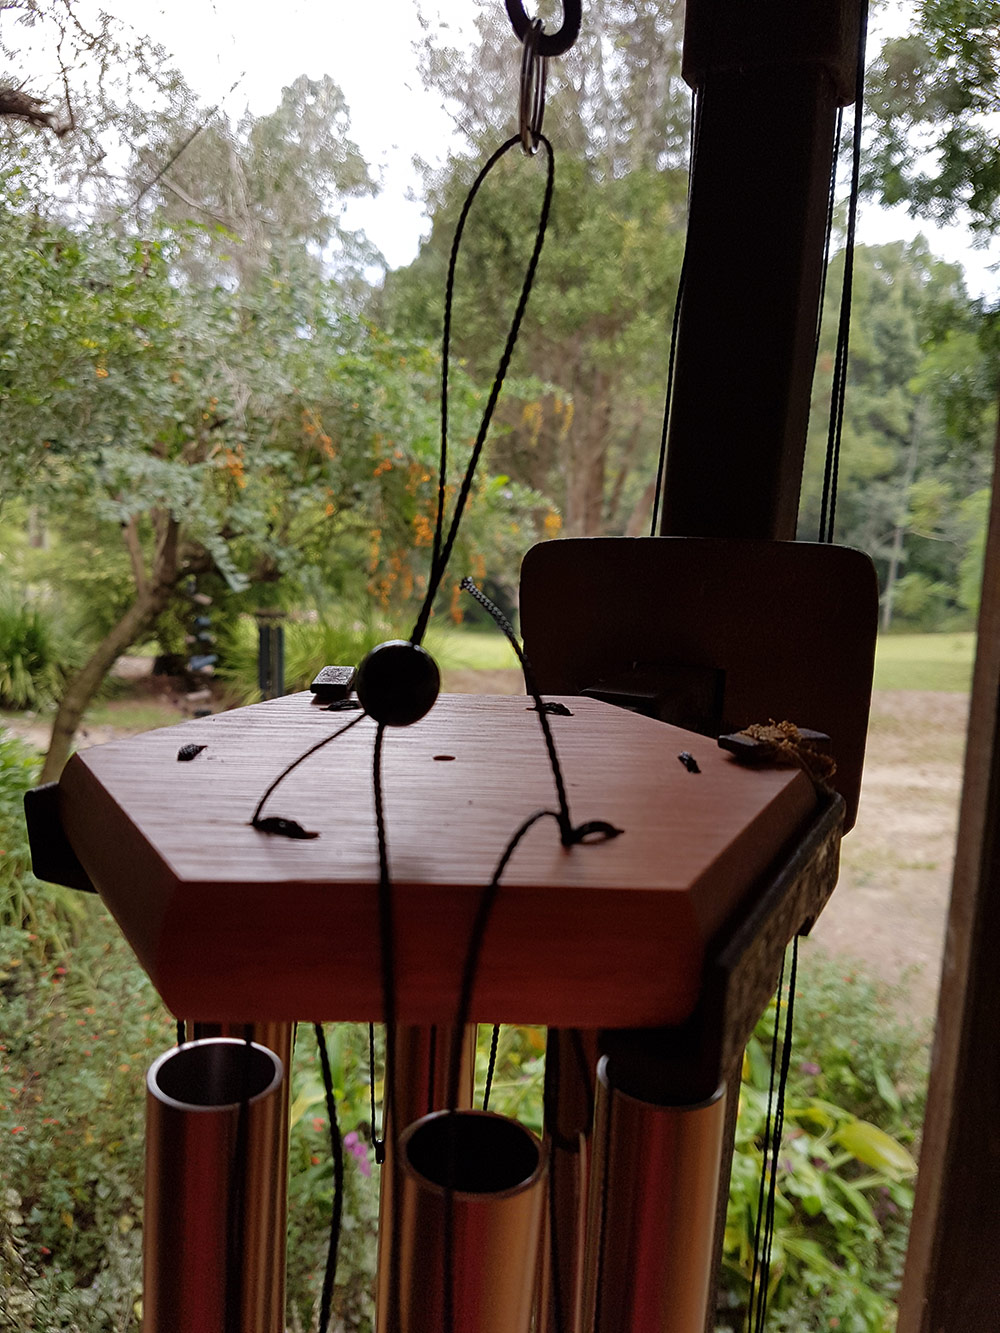
- The timber component should be positioned with the large centre hole at the top. Look underneath the top and you will see that one of the holes around the edge of the top is larger than the rest. You need to work from left to right, or in an anti clockwise direction and always thread through left hand hole.
- Insert needle from underneath into that larger hole
- Thread through bead and loop through keyring
- Repeat this pattern until you thread down through hole to the left of starting point
- Tie two ends together in a double knot and heat the ends with a flame to seal


Pipe stringing
- Hang the top from a hook and clamp it steady. You need the timber top at about eye level to do the job. The sequence of stringing the pipes is longest to shortest in an anti clockwise direction, ensuring that all the bevelled ends are facing outwards. Your starting point is the hole on the top of the timber top that is larger than the rest. It is crucial as you work your way round to ensure that you do not snag the top stringing cord.
- Insert needle from above though that larger hole, and tie a loose knot around the timber top to the cord underneath and make very sure that it is secure so that your first pipe doesn’t crash down to the ground
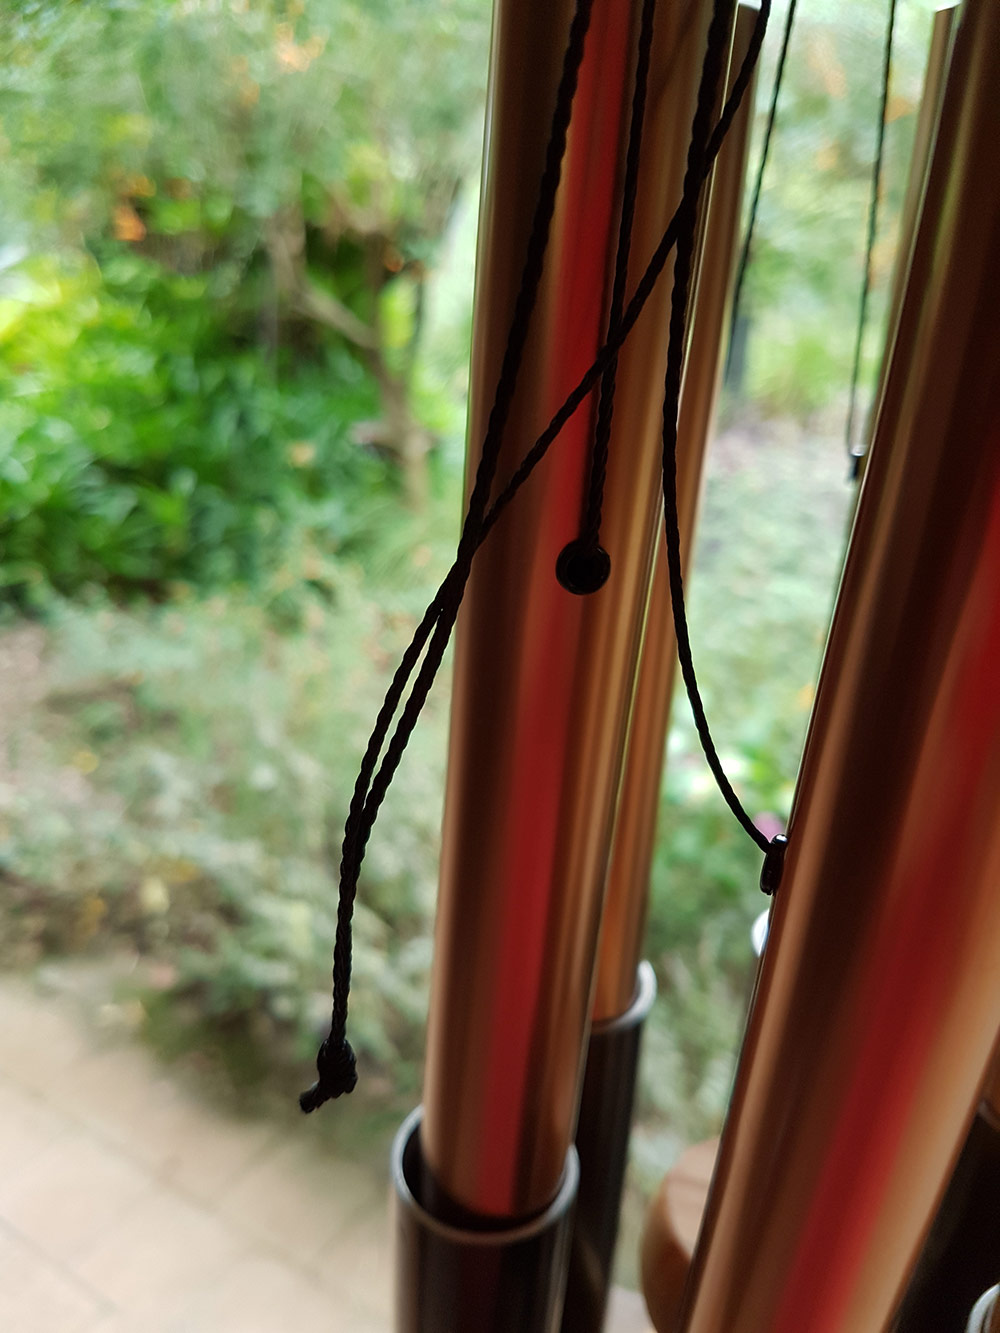
- Thread needle through the plastic grommets of pipe one and up to the next two holes in the timber top
- Insert needle from beneath top into left hand drill hole and down through adjacent hole and repeat so that you have a double bind on each two pipe stringing holes
- Repeat pattern until all pipes are tied on
- Aim for a distance of about 40 mm between top of pipes and base of timber top
- Make sure to do a double bind in the last two pipe stringing holes
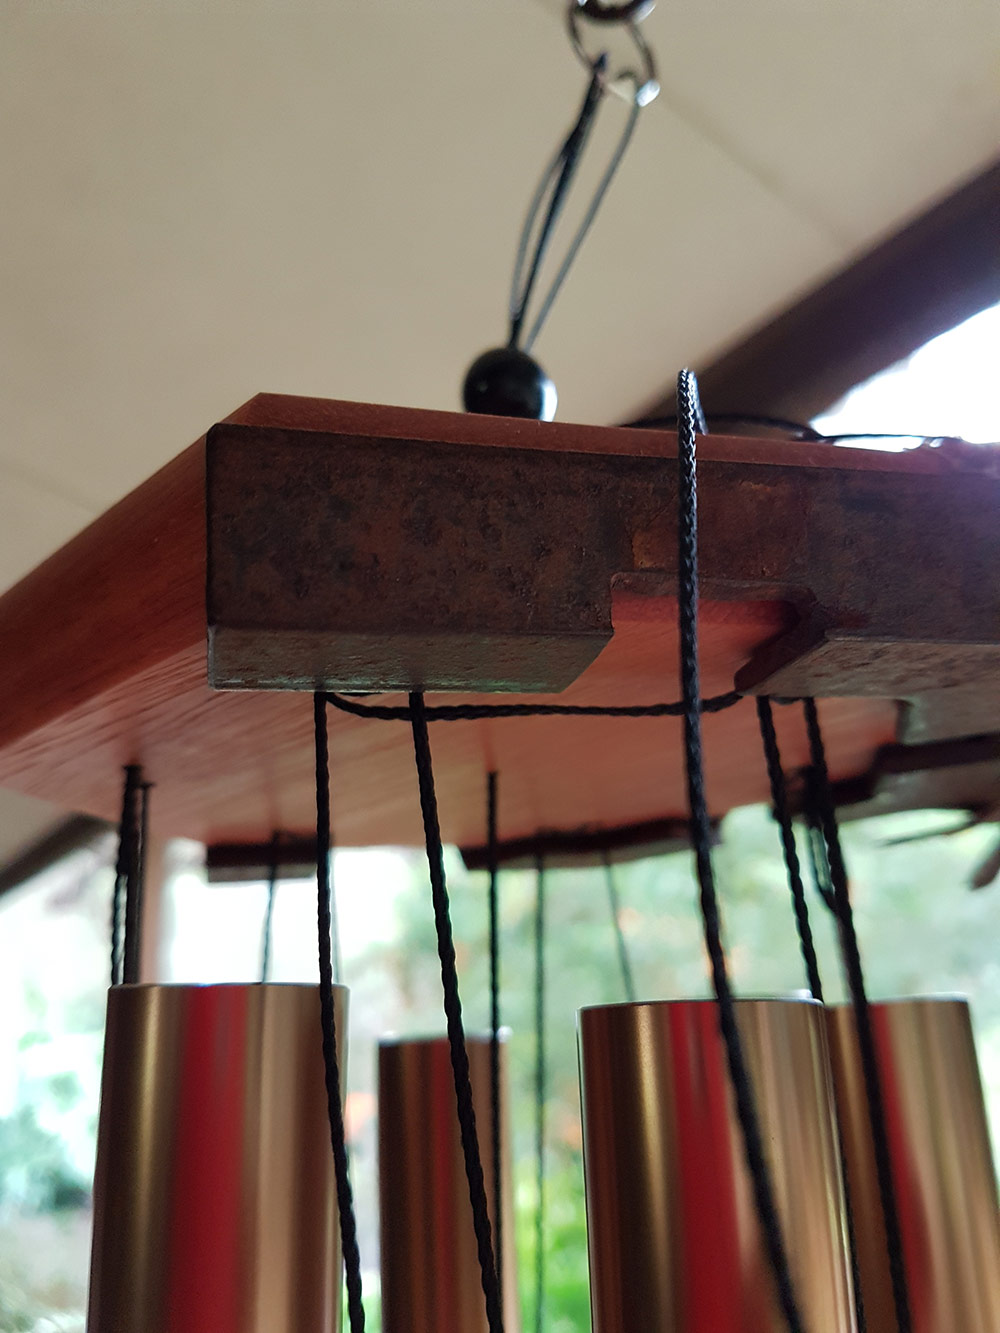
- Untie the section of the cord which is holding the longest pipe in place, and tie the two ends of the cord together. Do a double knot and seal the ends with a flame
- Make sure it is secure before you pull it into the large right hand hole to conceal the knot
- You should now pull the top stringing knot into a large hole underneath the timber top
- Level the timber top by holding it on each sides with two hands and moving to adjust
- Using a timber letter opener or a screwdriver, you can adjust the tops of the pipes so that they are all level. This is a tricky process but as there's a starting point and an end point that meet, if you keep working at it you can gradually get them level – it needs just the most tiny subtle movements.
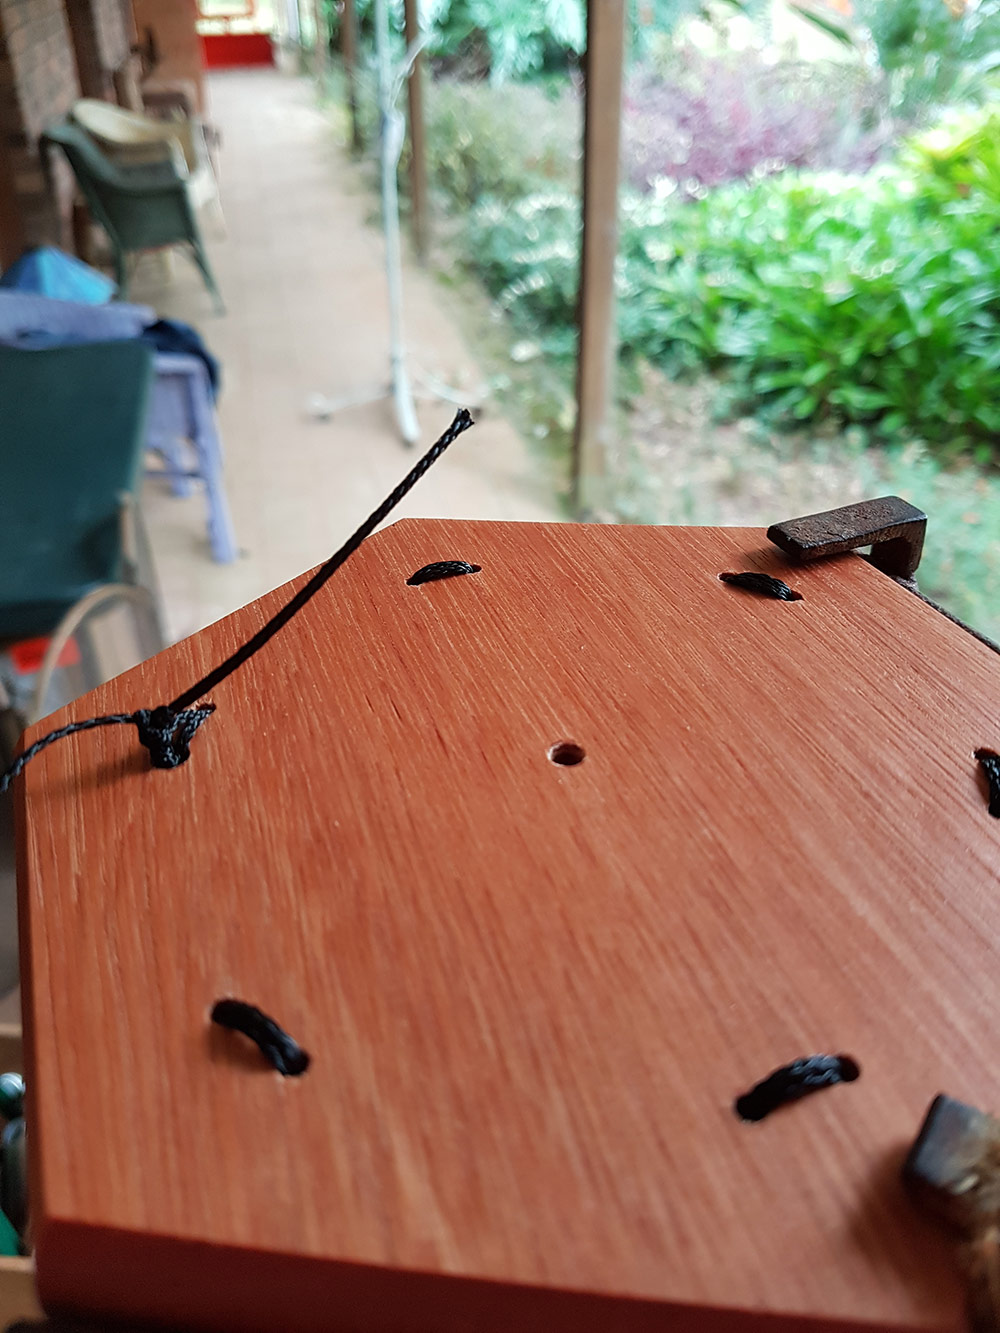


Centre stringing
- Use a flame to seal both ends of the centre stringing cord.
- Thread cord through large hole in centre of timber top and tie a double knot and pull into large hole to conceal knot
- Thread cord through small hole in round timber striker
- Position striker so that it is hitting the pipes about half way down the longest pipe
- Once you have striker in correct position tie a double knot and pull into large hole on base of striker to conceal
- Thread end of cord through sail and tie knot on the concave side of the sail. Heat end of cord with flame to seal. Ensure the sail is hanging low enough that it is not hitting the pipes.